
Storing Baby Formula in Mylar Bags
As a prepper, you understand the importance of being prepared for any situation. When it comes to ensuring that your baby’s nutritional needs are met

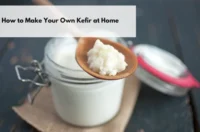
If you’re a fan of probiotic-rich foods, you’ve probably heard of kefir. This tangy, fermented drink is packed with beneficial bacteria and yeast, making it a fantastic addition to your diet. But did you know that you can make kefir at home with just a few ingredients? In this guide, I’ll walk you through the process of making your own kefir at home. It’s easier than you might think!
Kefir is a fermented milk drink made using kefir grains. These grains are not actual grains like wheat or rice but are instead small clusters of bacteria and yeast held together by a polysaccharide called kefiran. Kefir grains look like small, cauliflower-like clusters and are what transform regular milk into kefir through fermentation.
Making your own kefir at home comes with several unique benefits that go beyond just saving money. Here are some compelling reasons to consider brewing this probiotic-rich drink in your kitchen:
Store-bought kefir can be pricey, especially if you consume it regularly. Making your own kefir at home requires only a one-time investment in kefir grains, which you can reuse indefinitely, along with a steady supply of milk. Over time, the cost of homemade kefir is significantly lower than continuously purchasing it from the store. Plus, since kefir grains multiply, you can even share them with friends or family who are interested in starting their own kefir-making journey.
When you make your own kefir, you have complete control over the ingredients. This means you can avoid unwanted additives, preservatives, or artificial flavors that are often found in commercial kefir products. You can choose the type of milk you prefer—whether it’s organic, grass-fed, or non-dairy options like almond or coconut milk. This customization ensures that your kefir fits your dietary needs and preferences.
One of the main reasons people consume kefir is for its probiotic content. Store-bought kefir often contains fewer active cultures than homemade versions because commercial kefir is sometimes pasteurized after fermentation, which can reduce the number of live bacteria. By making kefir at home, you can ensure that your drink is rich in beneficial bacteria and yeast, providing the full range of probiotics that support gut health, digestion, and immunity.
One of the most satisfying aspects of making your own kefir is that you can control the fermentation process. Whether you prefer a mild or strong flavor, you can adjust the fermentation time to suit your taste. A shorter fermentation time results in a milder kefir with a slight tang, while a longer fermentation produces a more intense, sour flavor. Additionally, you can experiment with different types of milk to create unique textures and flavors.
Homemade kefir is not only good for your body, but it can also reduce your environmental impact. By making your own, you cut down on the packaging waste associated with store-bought kefir, which is often sold in plastic bottles. Plus, since kefir grains are reusable and self-replicating, you won’t need to continuously purchase new ones, further reducing your overall waste footprint.
For those who embrace a self-sufficient lifestyle or are interested in prepping, making your own kefir is an ideal skill to add to your toolkit. Kefir grains can last indefinitely with proper care, making them a reliable source of probiotics even when access to stores or commercial products may be limited. Having the ability to create your own nutritious food and drinks at home adds to your preparedness for emergencies or situations where you need to rely on what you have on hand.
When you make kefir at home, you know it’s as fresh as it gets. Store-bought kefir may sit on shelves for days or weeks before it reaches your kitchen, potentially losing some of its probiotic potency. Homemade kefir allows you to enjoy a fresh, high-quality product that is rich in live cultures and enzymes, enhancing its health benefits.
Once you’ve mastered the basics of kefir-making, it can become a fun and creative hobby. You can experiment with fermenting different types of milk, creating flavored kefir by adding fruits, herbs, or spices, and even using kefir in other recipes like smoothies, salad dressings, or baked goods. The possibilities are endless, and this creativity makes kefir-making an enjoyable, hands-on experience that you can personalize to your preferences.
Making kefir at home is simple, but having the right ingredients and equipment is essential for a successful fermentation process. Here’s a more detailed breakdown of what you’ll need:
Kefir grains are the most critical component of the kefir-making process. These grains are a symbiotic culture of bacteria and yeast (SCOBY) that work together to ferment milk into kefir. Kefir grains have a unique appearance, resembling small, gelatinous cauliflower florets.
You can buy them online, from health food stores, or through local communities where people often share grains for free. You only need to buy kefir grains once because they are reusable and will multiply over time if properly cared for.
There are two main types of kefir grains: water kefir grains and milk kefir grains. Be sure to get milk kefir grains for this process if you’re fermenting dairy. Water kefir grains are used for non-dairy beverages and have a different composition.
The milk you use is the base for your kefir. The type of milk you choose will affect the texture, flavor, and nutritional content of your kefir.
Kefir grains thrive best in cow’s milk, but you can also use goat, sheep, or even camel milk if available. Whole milk is preferred because the higher fat content gives the kefir a creamier texture and richer taste. However, low-fat or skim milk works just as well if you’re aiming for a lighter beverage.
If you have access to raw milk, it can be used for making kefir. However, it’s important to ensure that the milk is from a trusted source to avoid contamination. Pasteurized milk works well and is more commonly used.
You can also make kefir with non-dairy milk like coconut, almond, or soy milk, but this requires a bit more care since kefir grains feed on lactose (milk sugar). If you use non-dairy milk, you may need to “rest” your kefir grains in dairy milk every few batches to keep them healthy. Non-dairy kefir will not be as thick as dairy kefir but can still be delicious and probiotic-rich.
A clean, non-reactive container is essential for fermenting kefir. Glass is the best material for this purpose.
Glass jars are non-reactive and won’t interfere with the fermentation process. Avoid using metal containers, as they can react with the acidic kefir, potentially damaging the grains or altering the flavor.
A quart-sized glass jar is ideal for fermenting about 2 cups of milk, though you can scale up if you want to make larger batches. Make sure the jar is large enough to allow some space for the kefir grains to move and for any potential expansion of the liquid during fermentation.
While stirring or handling your kefir grains, it’s best to use plastic or wooden utensils.
Metal utensils can react with the kefir grains due to the acidic environment created by the fermentation process. Over time, this can weaken the grains and potentially affect their probiotic quality. Plastic or wooden spoons are neutral and won’t affect the grains.
A breathable cover is needed to allow airflow during the fermentation process while keeping dust, bugs, and other contaminants out.
Kefir grains need oxygen to properly ferment the milk. Covering your jar with a tightly sealed lid will block airflow, which can lead to poor fermentation or even spoilage. A piece of cheesecloth or a coffee filter is ideal because it allows air to circulate while still protecting the kefir.
If you don’t have cheesecloth or a coffee filter, a fermenting lid does a great job.
This is a simple but important tool for securing the cover on your jar.
Use the rubber band to hold the cheesecloth or coffee filter in place. This ensures that no contaminants can enter the jar while allowing air to flow.
When your kefir is ready, you’ll need to strain the grains out of the liquid before consuming the kefir. A plastic or non-metallic strainer works best.
Like with utensils, metal strainers can react with the kefir grains, potentially weakening them over time. A plastic strainer is gentle on the grains and helps separate them from the kefir without affecting their health.
Choose a strainer with small enough mesh to catch the kefir grains, which are typically very small and may slip through large holes.
Once you’ve strained your kefir, you’ll need a clean bowl or jar to store it.
The strained kefir can be transferred to a fresh glass jar with a sealed lid for storage in the refrigerator. You’ll want to use a jar large enough to store the entire batch of kefir, and if you plan to add any flavors, make sure there’s room for stirring.
After your kefir has fermented, you can add fresh fruits, honey, vanilla, or even herbs like mint to create flavored kefir. Just make sure these ingredients are added after fermentation is complete.
While not essential, a thermometer can help you monitor the temperature of your kefir as it ferments. The ideal fermentation temperature is between 20°C and 29°C, so if you live in a particularly hot or cold environment, this tool can be helpful.
Start with about 2 cups (500 ml) of milk. If you’re using non-dairy milk, make sure it’s unsweetened and has no added preservatives. Pour the milk into your clean glass jar.
Add 1-2 tablespoons of kefir grains to the milk. The ratio doesn’t have to be exact, but more grains will speed up the fermentation process.
Cover the jar with a cheesecloth or coffee filter and secure it with a rubber band. This allows the kefir to breathe while keeping out dust and insects. Place the jar in a warm, dark place—such as a cupboard—for 12-48 hours. The fermentation time depends on the temperature and your taste preference. A shorter fermentation will result in a milder kefir, while a longer one will produce a tangier flavor.
After fermentation, the milk will have thickened, and you may notice some separation, with a layer of whey forming at the top. This is normal. Stir the kefir gently to combine, then strain it through a plastic or non-metallic strainer into a clean bowl or jar. The kefir grains will remain in the strainer.
Your homemade kefir is now ready to drink! Pour it into a glass jar, cover it tightly, and store it in the refrigerator. Kefir will keep for about 1-2 weeks, but the flavor may continue to develop over time.
Place the strained kefir grains into a new batch of milk to start the process over again. If you’re not ready to make more kefir right away, you can store the grains in a small amount of milk in the fridge for up to a week.
Making kefir is a relatively simple process, but there are a few nuances that can help you achieve the best results and ensure that your kefir is both tasty and packed with probiotics. Here are some essential tips to help you master the art of kefir-making:
One of the key factors in making perfect kefir is using the right amount of milk and kefir grains.
A common rule of thumb is to use 1-2 tablespoons of kefir grains per 2 cups (500 ml) of milk. This ratio ensures that the grains have enough food (lactose) to ferment properly while also preventing the milk from over-fermenting, which can lead to a sour or over-thickened texture.
If you prefer a thicker or more sour kefir, you can experiment by using more grains relative to the milk. Conversely, if you want a milder flavor, you can reduce the number of grains or increase the amount of milk.
The temperature at which kefir ferments plays a significant role in how quickly it ferments and the final flavor profile.
The best temperature for kefir fermentation is between 20°C and 29°C. Temperatures lower than this range will slow down fermentation, while higher temperatures may cause the kefir to ferment too quickly, resulting in a very sour flavor or even killing the grains.
In cooler months, you may need to extend the fermentation time to 48 hours, while in warmer months, your kefir could be ready in as little as 12-24 hours. You can also wrap the jar in a towel or place it in a warm spot, like near the oven, to maintain the optimal temperature.
While kefir ferments, it can sometimes separate into curds (thicker kefir) and whey (liquid). This is a normal part of the process, but gently stirring the kefir once or twice during fermentation helps maintain a more consistent texture.
Stirring distributes the grains evenly and ensures that they have equal access to the lactose in the milk, leading to a smoother, more uniform kefir. Use a plastic or wooden spoon to gently mix the kefir once or twice during the fermentation period.
The fermentation time for kefir can vary depending on your personal taste preferences.
If you prefer a milder, slightly tangy kefir, ferment for a shorter period. The kefir will have a more subtle flavor, and the consistency may be lighter and thinner.
A longer fermentation will result in a thicker, more sour kefir. Some people prefer the stronger flavor and creamier texture that comes from allowing the kefir to ferment longer. The longer fermentation also means a higher concentration of probiotics.
You can taste the kefir after 12-18 hours to see if the flavor suits your liking. If it’s not quite tangy enough, let it continue fermenting for another 6-12 hours.
Your kefir grains are living cultures that need care to remain healthy and productive.
Healthy kefir grains will multiply over time. If your grains are growing well, it’s a good sign that they are thriving. If they stop growing or shrink, it may indicate an issue with the milk or the fermentation process.
Kefir grains need lactose to thrive, so make sure you’re using fresh milk. If you’re using non-dairy milk, such as almond or coconut milk, the grains may not get enough nourishment. To keep them healthy, rest the grains in dairy milk for a few hours every few batches. This will rejuvenate them and allow them to continue fermenting effectively.
Over-fermented kefir can become too sour and separated, with a thicker layer of curds and more whey. While still safe to consume, it may not be as enjoyable.
If your kefir becomes excessively thick and sour, or if the separation of whey is significant, it may have fermented for too long.
Keep a close eye on the fermentation time, especially in warmer weather when kefir can ferment more quickly. If your kitchen is particularly warm, check the kefir after 12 hours to prevent over-fermentation.
Once your kefir is ready, proper storage is key to maintaining its freshness and quality.
After straining the grains, transfer the kefir to a clean jar and store it in the refrigerator. Kefir will keep for 1-2 weeks in the fridge, though it may continue to ferment slowly, becoming tangier over time.
If you don’t want your kefir to become too tangy, consume it within the first few days of refrigeration. If you like a more intense flavor, you can let it sit for a longer period.
Cleanliness is important when making fermented foods like kefir. Using the wrong tools can interfere with the fermentation process or harm the grains.
Kefir is acidic, and when it comes into contact with metal utensils or strainers, a reaction can occur that may weaken the grains or affect the final product. Always use plastic, wooden, or silicone utensils when handling kefir grains.
Make sure all your equipment—jars, spoons, and strainers—are clean before using them. This will help prevent unwanted bacteria from contaminating your kefir.
To create flavored kefir, it’s best to add your ingredients after the fermentation process is complete.
You can add fresh or frozen fruits, honey, vanilla, or herbs like mint or basil after straining the kefir grains. Simply blend or mix them into the kefir and let it sit in the fridge for a few hours to allow the flavors to meld. This is known as “second fermentation” and can add a new dimension of flavor to your kefir.
Adding sugary ingredients before fermentation can disrupt the process or create an overly yeasty flavor.
As your kefir grains multiply, you may find yourself with more than you need. Storing them correctly will allow you to keep a backup or share them with others.
If you’re not making kefir for a few days, you can store your grains in the fridge in a small amount of milk for up to a week. For longer storage, freeze them in milk or dry them out to preserve them for future use.
Making kefir at home is a simple and rewarding process. Not only do you get a delicious, probiotic-rich drink, but you also gain the satisfaction of creating something healthy and natural from scratch. With just a few ingredients and some patience, you can enjoy fresh, homemade kefir any time you like. Give it a try, and your gut will thank you!
As a prepper, you understand the importance of being prepared for any situation. When it comes to ensuring that your baby’s nutritional needs are met
If you’re a fan of probiotic-rich foods, you’ve probably heard of kefir. This tangy, fermented drink is packed with beneficial bacteria and yeast, making it
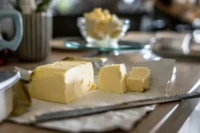
Making your own butter at home is a rewarding and surprisingly simple process. With just a few basic ingredients and tools, you can create rich,
Direct Banktransfer